Amazon S3 | Product Documentation
AWS S3 is a standard storage instance provided by Amazon Web Services. Many businesses use AWS S3 to store all kinds of files and data.
You can use your AWS S3 bucket to store your site backups generated with ServerKade. If you are not already an AWS user, the process might seem lengthy and difficult compared to other storage services like Wasabi, Dropbox, and Google Drive. But if you have experience with AWS, it will be easier for you to integrate AWS S3 with ServerKade.
Here are the steps you must follow to connect ServerKade with AWS S3.
Create User for S3 on AWS
Step 1: Log in to the IAM console.
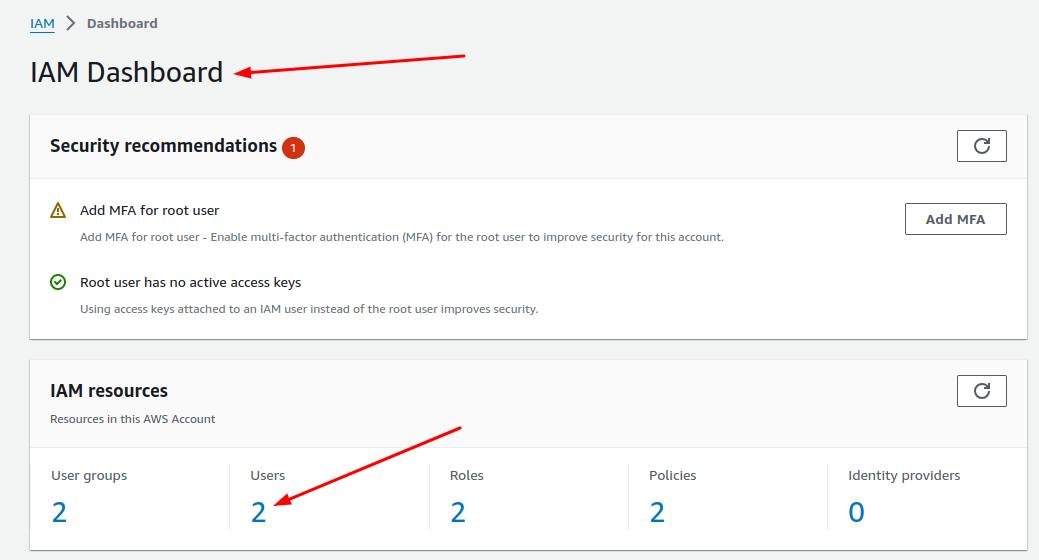
Step 2: Select the Create User option for user creation.

Step 3: Provide a user name and then click on the Next button.
Step 4: Select Add user to group in permissions options and click on Create Group as shown in the image below.
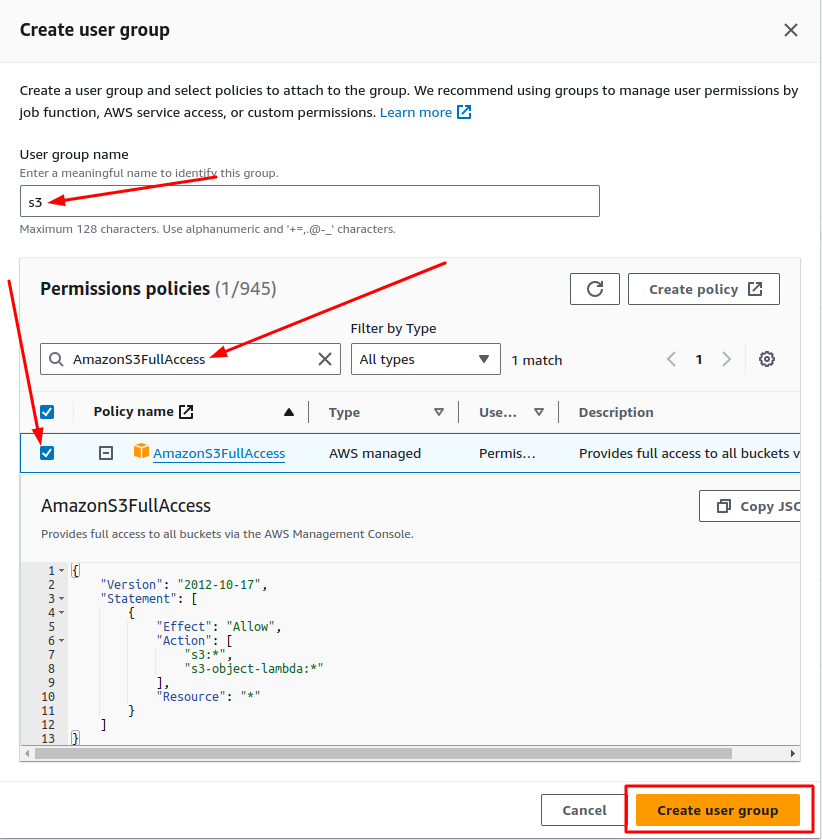
Step 5: In the Create user group section, enter User Group Name, locate the permission policy AmazonS3FullAccess, select the same policy from the list, and click on the Create user group button.
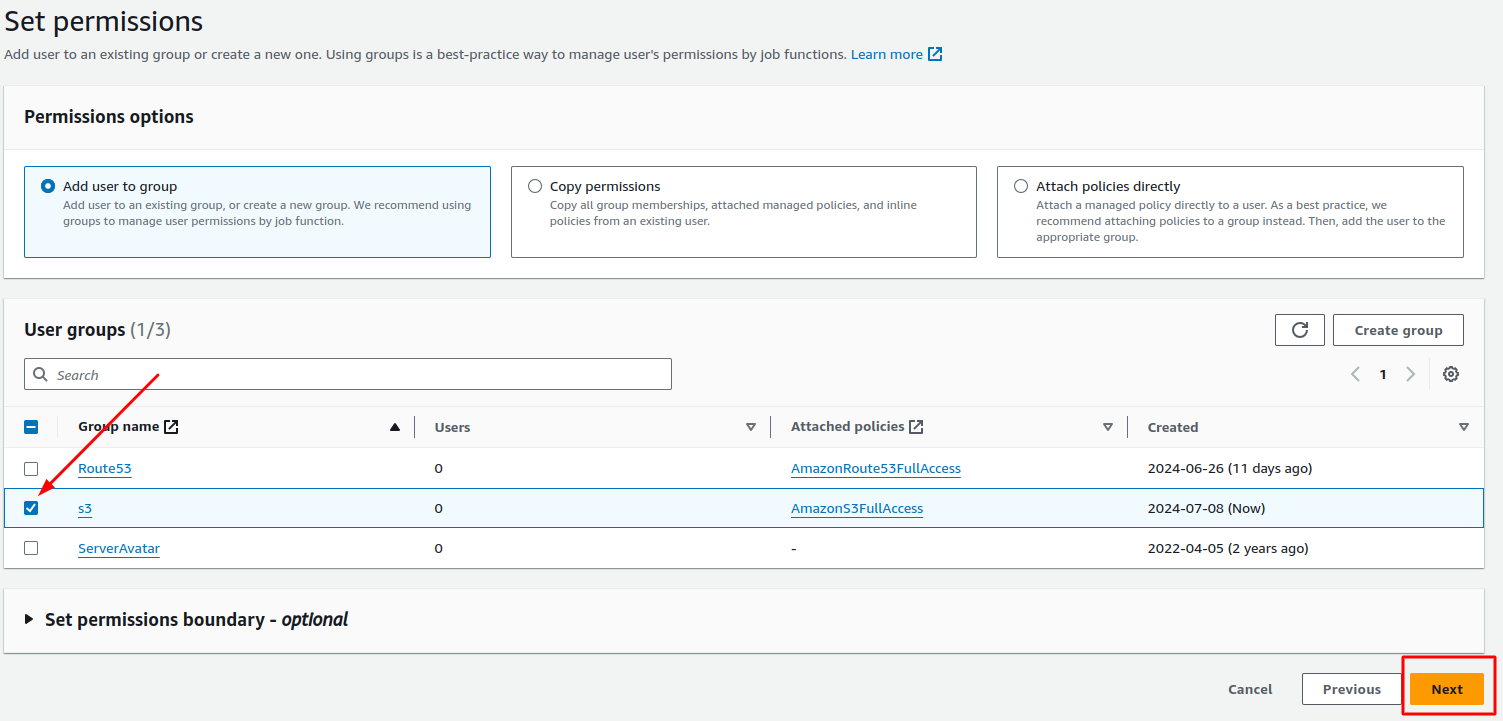
Step 6: Select the group that we created in the Create User Group section, then proceed by clicking Next.
Step 7: In the Review and Create section, verify your User details such as User name and selected Permission Policy are applied correctly. Now, click on Create User.
Step 8: Select the user that was previously created from the User section in IAM Dashboard.
Step 9: Click on Create Access Key option located on the Summery page of the user.
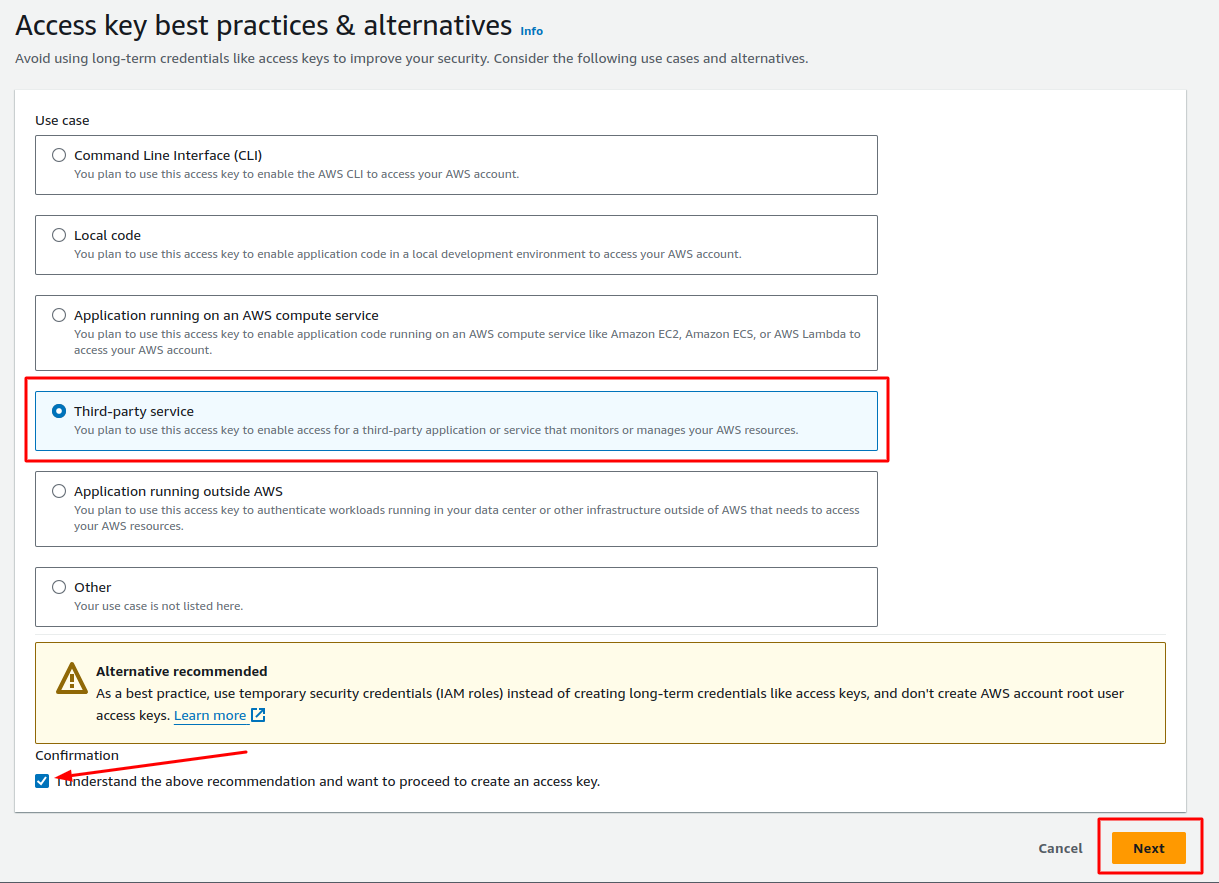
Step 10: Select the Third-Party Service option. then select the confirmation checkbox to create the access key and click on the Next button.
Step 11: On the next page, the description tag is optional. If you wish to add a description for the access key, you can add it in the description tag section. Then, click on the Create access key button.

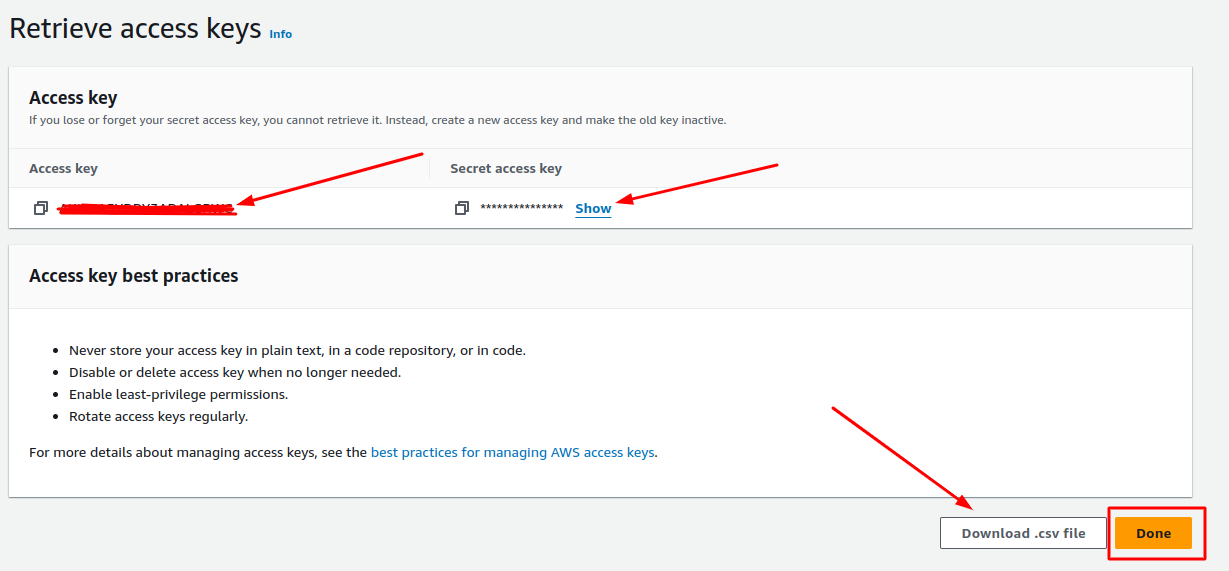
Step 12: In the next step, you will get your Access Key and Secret Access Key. You can save the key by copying them or downloading a .csv file using the Download .csv button. Once you have saved the keys, click on the Done.
Create Bucket on AWS S3
Step 1: Sign in to the Amazon S3 and select Create bucket.

Step 2: Enter the Bucket name, select the Bucket type, and choose the AWS Region in the general configuration.
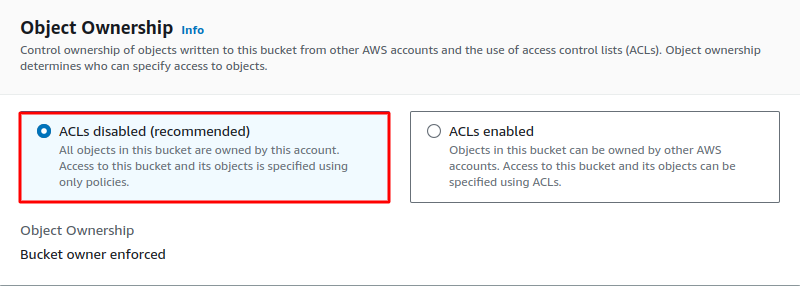
Step 3: Next, you need to select the Object Ownership option. We recommend choosing “ACLs disabled” for object ownership.
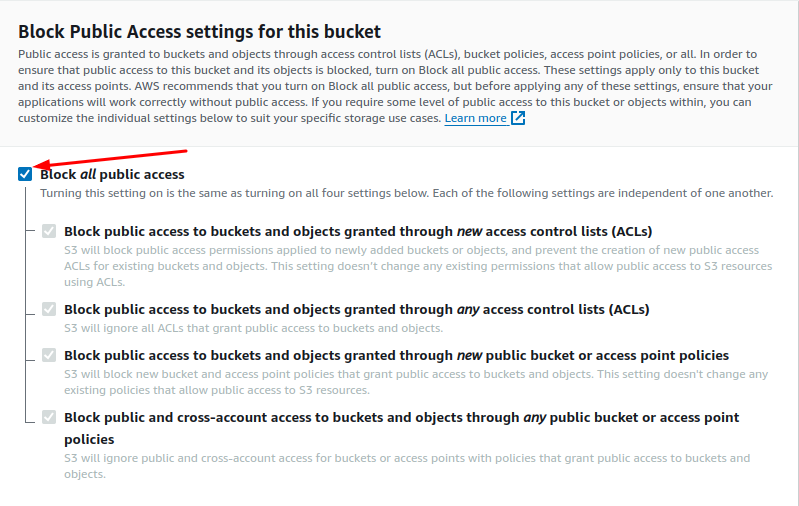
Step 4: The next step is configuring the access settings for the bucket. We recommend selecting Block all public access for this bucket.
Step 5: Now, You need to decide whether to enable or disable bucket versioning according to your requirements.

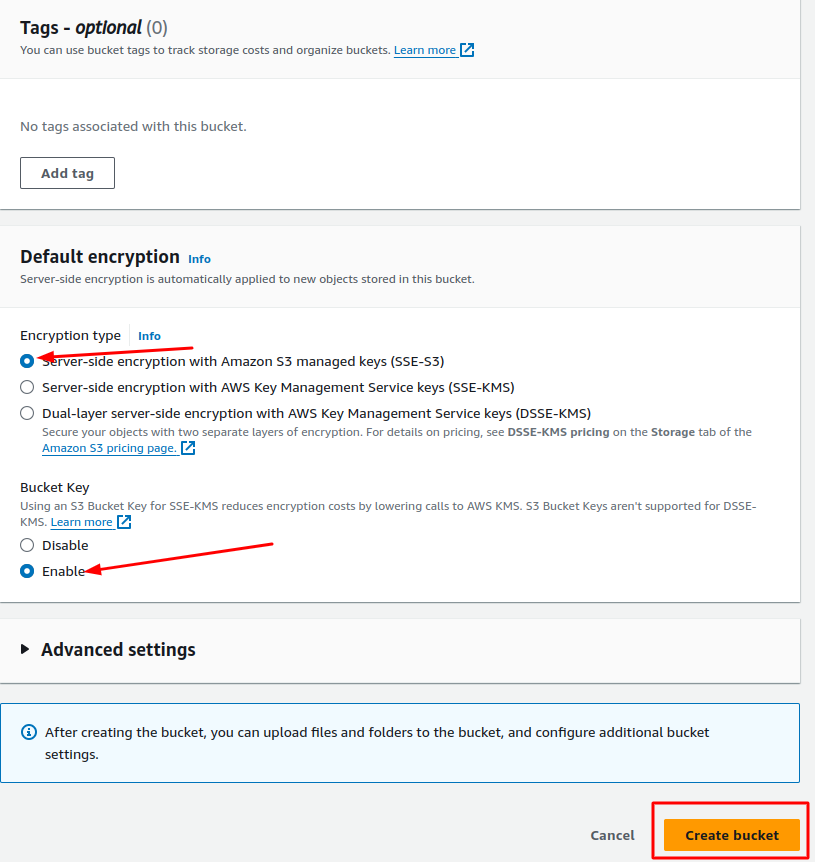
Step 6 Next, you can optionally add tags if desired, then select the encryption type and select whether to enable or disable bucket key. After selecting the apropriate options, click on the Create bucket button.
Step 7: Now, Click on your bucket link.

Step 8: Click on Create folder button.

Step 9: Enter the Folder name “serverkade” and click on Create folder.
Set up Amazon S3 Provider on ServerKade
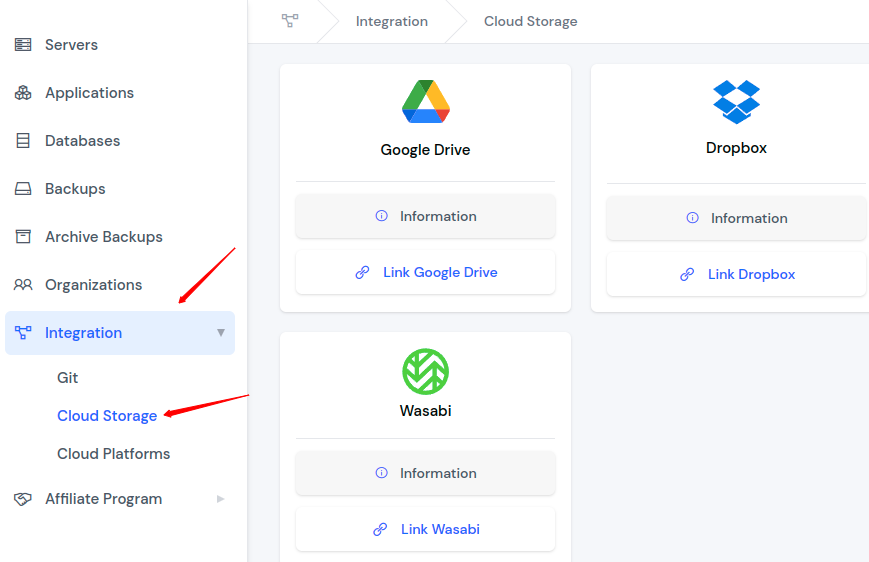
Step 1: Click on an Integration on the left sidebar, then click on Cloud Storage.
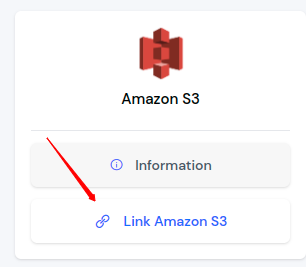
Step 2: Click on the Link Amazon S3 button.
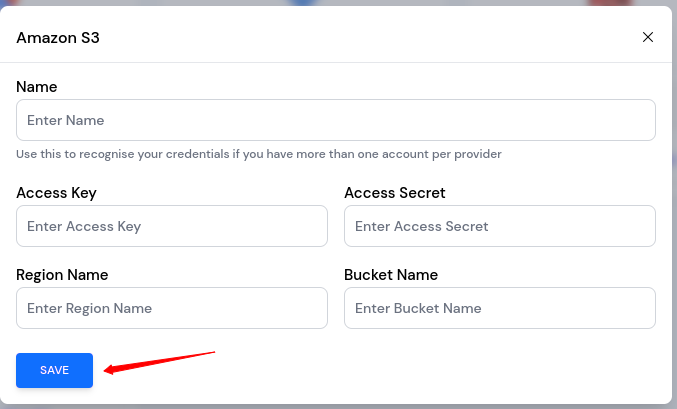
Step 3: Enter Name, Access Key, Access Secret, Bucket Name and Region Name after a click on the Save button.
