Create
You can create and manage MySQL databases on your server using ServerKade. You can also create different “Database users” for your databases.
Here is how you can create a MySQL database in Ubuntu with ServerKade.
Step 1: First, log in to your ServerKade account.
Step 2: Click on the Server Dashboard button.

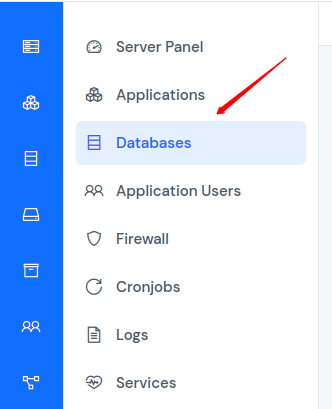
Step 3: You will see the Databases option on the left-hand sidebar of the Server Panel. Click on Databases.

Step 4: Now, you will see the Databases table, as shown in the image below.

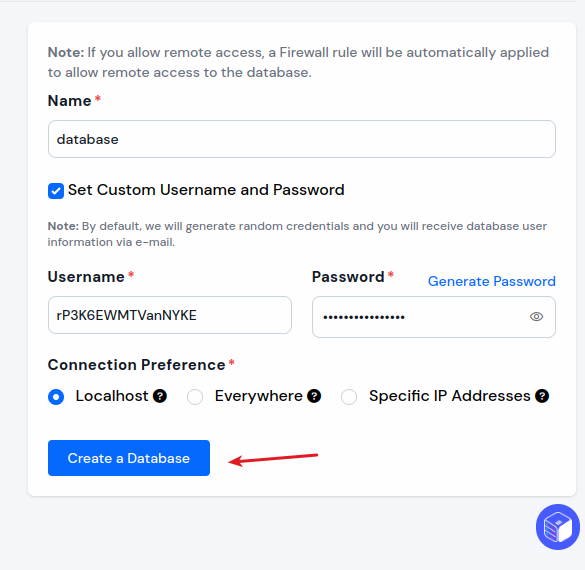
Step 5: Click on the Create button on the top right of the Databases table, as shown in the image above. A form will appear below in which you have to fill in the necessary details. Then, click on the Create Database button.
You can also set custom username and password options by clicking on Set Custom Username and Password. Note that ServerKade will set it automatically if you don’t want to fill it manually.
The connection preference defines where the user can connect from:
Everywhere: Allow connections from any IP address. This is useful for users who need to access the database from various locations, but it can be less secure.
Specific IP: Allow connections only from specified IP addresses. This option enhances security by restricting access to known IP addresses. You can specify multiple IP addresses.
Localhost: Allow connections only from the localhost (127.0.0.1). This is the most secure option, but it limits access to the machine where the database is hosted.


